 So you’ve got one of our cards, or you have another card with a setup you’ve been working for a while and you want to backup your work and preserve it. You should do that now! Here’s how to do it:
1. Install Win32Disk Imager
There are other microSD card image flashing tools around, but we’ve found Win32Disk Imager to be extremely reliable, and it’s the one we use daily, so it’s the one we recommend. You can download it here.
Install it after you finish downloading. You might need Administration privileges on Windows 10 to install it. You can safely allow it to install and work.
2. Preparing the Backup
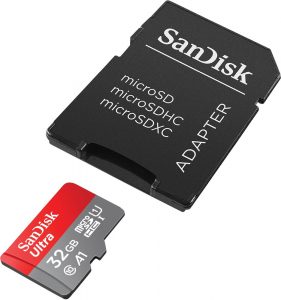
Insert the microSD card in your computer’s microSD slot. If you don’t have one, try an SD slot with the SD card adapter that comes with your microSD card. If you still don’t see a place to use these, you might need to purchase an adapter from Amazon.
ATTENTION: If the card inserted has Retropie installed, you’ll get a number of messages in Windows 10, like the card needs formatting and maybe a couple of other error messages. This is normal! Don’t worry! Just close the windows that pop-up and move on.
Please make note which “drive” is the drive where the microSD is. Because the microSD card with Retropie has 2 partitions, one of them will have some files (the main, boot partition), and the other will be unreadable. We don’t recommend you to mess up with any of these partitions, you need to back it up first!
3. Open Win32DiskImager
It will look like this:
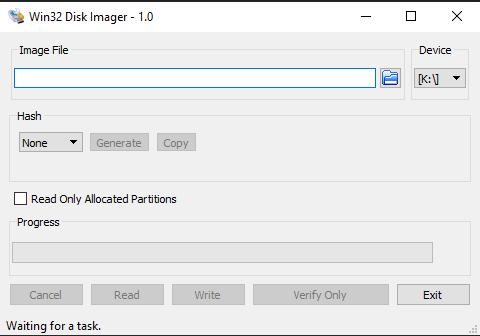
With the microSD card inserted, and Win32DiskImager ready to go, click on the “Device” drop-down menu to select the device where the microSD card that needs to be backed up is inserted.
After you find it, you need to give a location and a name to your backup image that is going to be created. To do so, click on the blue folder, and select a location and a name for your backup image, let’s say D:/Retropie/backup.img
Make sure the filename ends with .img
ATTENTION: This should be a non-existent file! You are creating a new one with Win32DiskImager! Don’t select another image on your drive, because it will damage or overwrite it! Also, make sure your computer’s hard drive has enough space for the image file that is going to be created.
4. Backing Up The Card
Make sure everything is fine, and then click on the READ button to start creating the image in your hard drive.
PLEASE NOTE: The backup process may take a while. It depends on the size of the card, and if you are using the computer while trying to backup a microSD card for gaming, navigating online, downloading stuff or watching a movie! We recommend you to leave your computer alone while it creates the backup file!
32GB cards might take 30 to 45 minutes, 128GB cards 1 to 2 hours and so forth. 400GB cards take about 5 hours to backup, so be aware before you start. Interrupting the process in the middle might corrupt both the card and the card image that is being created on your computer, so be careful.
The program will pop an OK screen after you are done! Congratulations, your card is fully backed up and you should have an .IMG file on your hard drive that you can use to restore your precious Raspberry Pi image whenever you want!
hi. its not letting me back it up. keeps saying disk isnt large enough for this image…. ?
Michael, thank you for contacting us!
This happens when you create an image of the card and then you try to flash the image on a different card that is of a different size than the original card, and before you say that both cards are 128gb, or 32gb or whatever, keep in mind that different manufacturers have different sizes for their card. In my experience, the card that has more “space” on it, is the Samsung cards. If I create an image of a Samsung card, I can only flash it back on an identical card, otherwise it will not work, because Sandisk and all other manufacturer’s cards are slightly smaller, even if the package says they are the same.
We’ve been using cards of many manufacturers, and I’ve favored using the “smaller” cards over time, due to the size issue, so they can be backed up everywhere. Here’s the cards we’ve used over the years and their sizes comparison, from the smallest to the biggest ones:
1 – Silicon Power (smallest)
2 – Onn or PNY
3 – Sandisk
4 – Samsung (biggest)
So a backup of an original Sandisk card can be only backed up to another Sandisk or a Samsung.
Finally, keep in mind that it is very common to get fake Sandisk and Samsung cards from eBay and Amazon. Make sure the card you’ve purchased is original. If you don’t know, try format the card and see if you can get the maximum size from it. Also, fake cards will fail formatting, or take too long to format, because their boot information was altered to report a certain size, but usually the card is actually a lot smaller. I’ve got fake Sandisk 256gb cards over the years that don’t hold more than 16gb.
I hope that answered your questions. Thanks again for asking!
Hi.
How do you backup if you have a MAC? Will Win32 Disk Manager work with iOS?
Vu, Unfortunately, Win32DiskImager does not work on a Mac, and right now, it seems that there is not a software that can do it all for the Mac, like Win32DiskImager does on a PC, however, I found this guide and it seems to be pretty easy to do it on a Mac using regular system tools, take a look:
https://medium.com/@ccarnino/backup-raspberry-pi-sd-card-on-macos-the-2019-simple-way-to-clone-1517af972ca5
Thanks again for submitting this question.
Do i need to back up both the readable and unreadable drives or is the readable all i need
Thank you for your question! Just point the program to the readable partition of the card and click the button to create the image on your computer. It will bring the unreadable partition along and create a full image for you. I am not sure if you do the unreadable partition first, if it will bring the readable along the same way, never tried it.